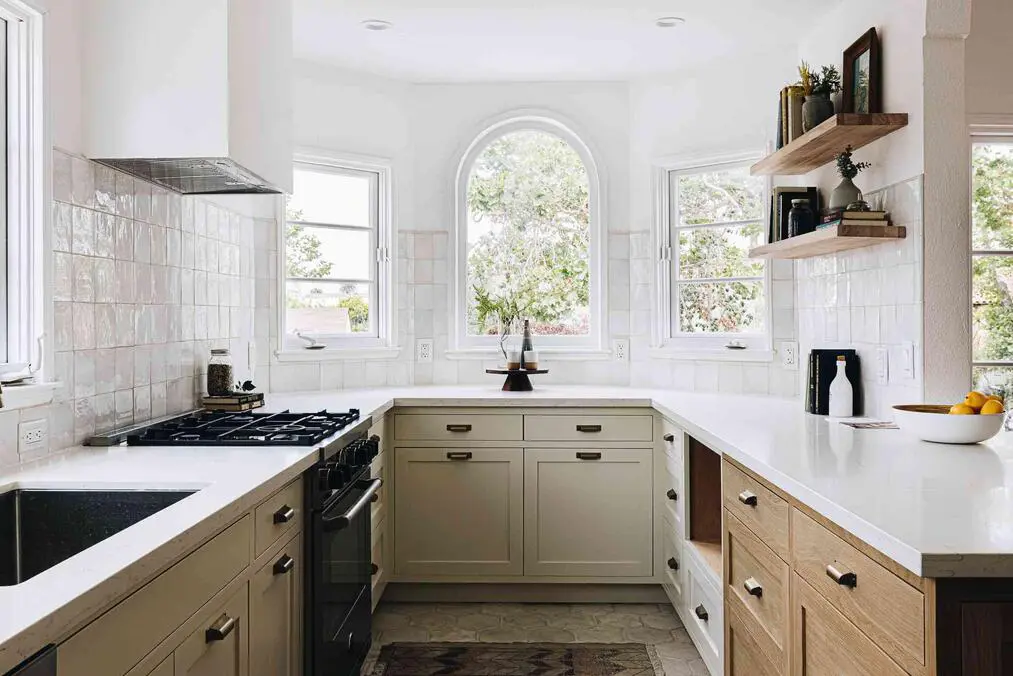
Common Cabinet Painting Mistakes to Avoid at Home
Painting your cabinets might seem like a budget-friendly way to refresh your kitchen or bathroom. With a few rollers and a can of paint, what could go wrong?
A lot, actually.
Cabinet painting is one of the most deceptively tricky home projects. The surfaces are often coated in grease, the paint needs to be ultra-durable, and even the smallest prep mistake can leave you with peeling corners, streaks, or sticky doors that won’t close properly.
At Seaside Coatings, we’ve seen our share of cabinet paint jobs gone wrong—and we’ve been called in more than once to fix them. So if you’re considering tackling your cabinets yourself, this guide will help you steer clear of the most common cabinet painting mistakes to avoid at home.
Skipping Proper Cleaning and Degreasing
Cabinets—especially in kitchens—are magnets for grease, fingerprints, cooking oils, and cleaning product residue. And no, a quick wipe with a damp cloth isn’t enough to prep them for painting.
Paint won’t stick to greasy or dirty surfaces. Even if it looks clean, invisible layers of grime will interfere with adhesion, causing your new paint to bubble, peel, or slide right off.
At Seaside Coatings, we start every cabinet job with a thorough cleaning using professional-grade degreasers that break down kitchen buildup. Once cleaned, cabinets are rinsed and dried before sanding and priming, setting the stage for lasting results.
If you skip this step or underestimate its importance, your finish may fail within weeks, especially in humid Florida kitchens.
Using the Wrong Type of Paint or Primer
Not all paints are created equal, and using the wrong one on cabinets is one of the most common and costly mistakes homeowners make.
Cabinets need to hold up to daily use: opening and closing, hand oils, heat, humidity, and cleaning. Standard wall paint, especially anything labeled as “flat” or “eggshell,” just doesn’t have the toughness needed for this kind of wear.
Common DIY pitfalls include:
- Using latex wall paint with poor adhesion or durability
- Skipping the primer entirely
- Choosing a primer that doesn’t block stains or bond properly to slick surfaces like laminate or finished wood
At Seaside Coatings, we use bonding primers specifically designed for hard surfaces, along with high-performance enamel or urethane-fortified cabinet paints. These finishes are made to resist chipping, scuffing, and yellowing, keeping your cabinets looking fresh for years.
Using the wrong paint might save a few bucks today, but it can lead to a full repaint (or replacement) tomorrow.
Skipping Sanding Between Coats
Sanding may seem like an optional step—especially if your cabinets feel smooth to the touch—but skipping it is one of the most common reasons paint jobs look amateurish and fail early.
Sanding helps create a surface that paint can mechanically grip onto. Without it, your paint sits on top of the surface like a film, prone to peeling or chipping with even light wear.
And it’s not just about sanding before you start—sanding between coats is just as important.
What goes wrong when you skip it:
- Uneven surfaces
- Visible brush strokes or roller texture
- Drips and ridges that get sealed into the final coat
- Poor adhesion that shortens the life of the finish
Professionals sand lightly between every coat using the right grit to maintain smoothness while helping each new layer bond better. This small step ensures a flawless, furniture-grade finish—the kind that elevates your entire kitchen, not just the cabinets.
Painting Cabinet Doors Without Removing Them
If there’s one shortcut that almost always leads to a disappointing result, it’s trying to paint cabinet doors without taking them off the hinges. It might seem like a time-saver, but it’s a recipe for uneven edges, paint drips, and missed spots.
Why this mistake stands out (in all the wrong ways):
- Brush marks or roller lines along hinge areas
- Paint buildup around hardware
- Uneven coverage along edges and corners
- Risk of paint sealing hinges or sticking doors shut
Professionals remove all cabinet doors, drawers, and hardware, labeling each piece for reinstallation. Doors are then sprayed or brushed separately in a controlled environment (not in your kitchen), which allows for better coverage and cleaner lines.
This process also protects your countertops, floors, and backsplash from paint splatter and keeps your cabinet boxes accessible for proper edge work. It’s more work—but it’s the only way to get a finish that looks custom, not homemade.
Rushing the Drying and Curing Process
One of the biggest mistakes DIYers make isn’t in the prep or the paint—it’s in the patience. Just because a surface feels dry to the touch doesn’t mean it’s ready for use.
What’s the difference between drying and curing?
- Drying means the paint is no longer tacky.
- Curing means the paint has fully hardened and bonded, which can take 7–30 days depending on the product and environment.
What happens when you rush it:
- Smudges, fingerprints, and streaks
- Sticky cabinet doors that don’t open or close cleanly
- Paint that scratches or chips easily under minimal use
At Seaside Coatings, we factor dry time and cure time into every project plan. We use controlled airflow, humidity control, and schedule staging carefully to ensure the finish isn’t just beautiful—it’s durable. Our team also educates homeowners on when and how to safely use newly painted cabinets, so there’s no guesswork.
Skipping this final step can undo all the hard work that came before it. When it comes to cabinet painting, the cure is just as critical as the coat.
Great Results Require the Right Process
Painting cabinets may look simple on the surface, but behind a flawless, long-lasting finish is a carefully planned, multi-step process. From degreasing and sanding to choosing the right products and respecting cure time, every detail matters.
Let’s recap the most common cabinet painting mistakes to avoid at home:
- Skipping proper cleaning and prep
- Using the wrong type of paint or primer
- Forgetting to sand between coats
- Painting doors without removing them
- Rushing the drying and curing process
Each of these shortcuts can lead to peeling, bubbling, uneven coverage, or worse, requiring costly fixes later on.
If you want a cabinet transformation that looks high-end and holds up to daily use, your best move is to hire a trusted professional. At Seaside Coatings, we specialize in residential cabinet painting in Fort Myers and surrounding areas, using a proven process and premium materials that deliver real results.
Ready to upgrade your cabinets without the DIY risk? Request a free estimate or contact our team today to learn more about our expert cabinet painting services.